Leave Your Message

7 CPR Mannequin Buying Tips for Global Buyers

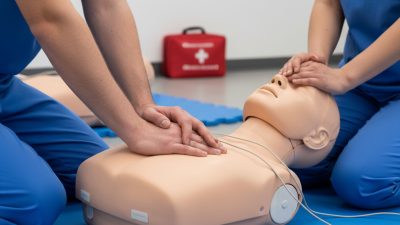
A CPR Mannequin is more than a molded torso on a training-room table. Its feedback, durability, and fit for learners can shape every practice session. Global buyers also weigh shipping, maintenance, replacement parts, and supplier support. A low purchase price may look attractive, but weak feedback or hard-to-find parts can cost more later. Details matter.

Paraphrasing resuscitation pioneer Dr. Peter Safar—not quoting him verbatim—the guiding principle is simple: “Realistic practice helps learners build confidence through repetition.” This guide explores seven buying tips, from choosing the right learner level to checking compression feedback, ventilation features, materials, and after-sales support. It also considers how to compare product specifications and confirm that training equipment aligns with the requirements of your program. A photo may show a convincing face. It cannot show how clearly the manikin signals incorrect hand placement, or how easily its airway can be cleaned between sessions. Ask for those details.

No single model suits every classroom, clinic, or training center. Some buyers may value portability; others need robust equipment for frequent use. The choice is rarely perfect. This introduction sets up a practical checklist for comparing options, asking suppliers sharper questions, and selecting a CPR Mannequin that supports consistent, hands-on training.
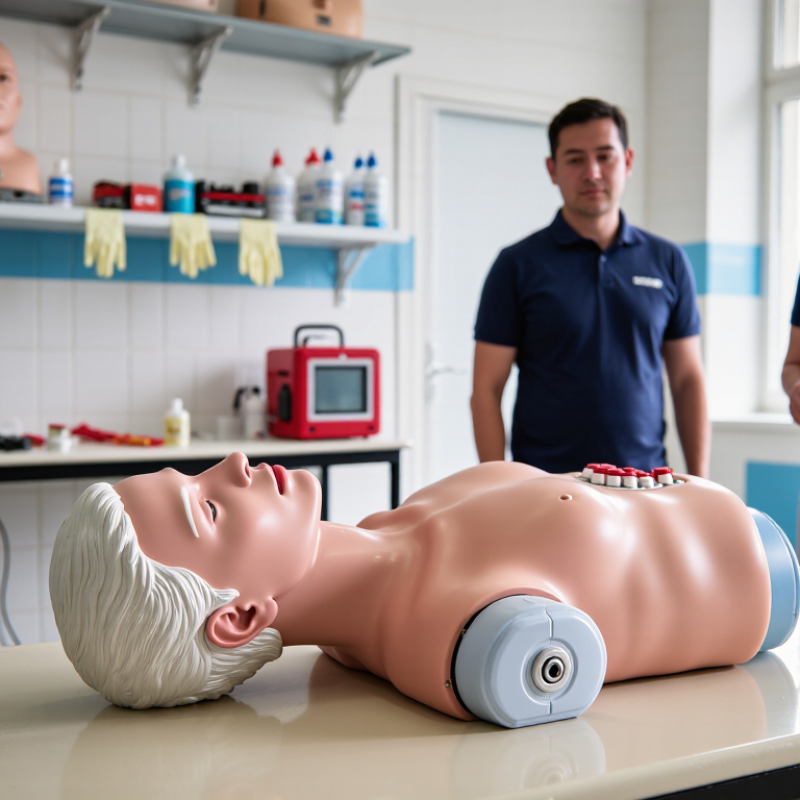
7 CPR Mannequin Buying Tips for Global Buyers

Define Training Scope: Adult, Child, Infant, and AED Practice Needs

A mannequin should match the people learners may need to help. The American Heart Association’s 2024 Heart Disease and Stroke Statistics update estimates about 356,000 out-of-hospital cardiac arrests occur annually in the United States; nearly 90% are fatal. For adult practice, choose a model that gives realistic chest recoil and supports compressions at 100–120 per minute and 5–6 cm deep, as recommended in the AHA’s 2020 CPR and ECC guidelines. Child and infant models matter too: recommended compression depth is about one-third of the chest, roughly 5 cm for a child and 4 cm for an infant.

Tips: Map the training audience before buying. Check whether learners need adult-only refreshers, pediatric response, or infant care. If AED practice is included, confirm the mannequin supports pad placement and realistic practice scenarios. Pads should be easy to position on a small chest. Test the setup in the room where training will happen.

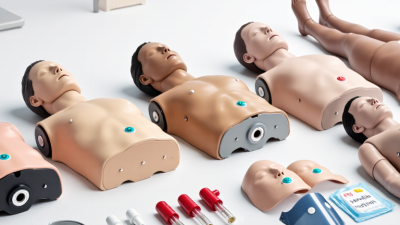
One model rarely covers every need well. A modular set can save storage space, but changing parts between sessions may slow instructors down. That trade-off is easy to overlook. Ask trainers to demonstrate the models with the exact lesson plan, including two-rescuer practice where relevant. Confirm that faces, airways, and chest resistance are simple to clean and reset. These details affect practice time and learner confidence.
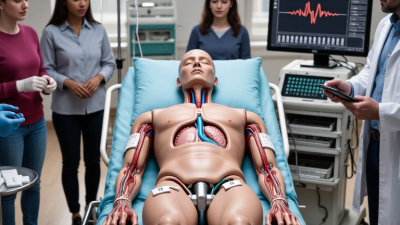

Set Adult Performance Targets: AHA Recommends 100–120 Compressions per Minute

For adult CPR training, set a clear performance target: 100–120 chest compressions per minute, the rate recommended by the American Heart Association. A mannequin should help learners feel and maintain that rhythm, not merely display a number. Check whether its feedback responds immediately when compressions become too slow or too fast. A visible timer or simple beat cue can help, but it should not distract from hand position and steady technique.

Test the mannequin with several learners before buying. Ask them to compress for a full practice cycle and watch whether the rate stays consistent as they tire. Useful feedback should also indicate compression depth and chest recoil, since speed alone does not show whether practice is effective. Small details matter. A screen that is hard to read under bright classroom lights may be less useful than expected. For international purchasing, confirm that the instructions and measurement units suit the intended training setting. A device may meet a listed specification and still feel awkward to use. That is worth checking in person, when possible.

Check Compression Depth Feedback: AHA Adult Target Is at Least 5 cm, Avoiding Over 6 cm

When comparing adult CPR mannequins, check whether depth feedback is clear, immediate, and easy to verify. The American Heart Association’s 2020 CPR and ECC Guidelines recommend compressions at least 5 cm deep while avoiding depths greater than 6 cm. That is a narrow working range. A useful mannequin should show whether each compression falls within it, not merely flash a general “correct” signal.

Ask how the sensor measures depth and whether staff can test its accuracy during routine checks. A display that reports centimetres is easier to interpret than a vague light or sound. Check the reset, too. In a practical trial, watch whether feedback changes promptly as pressure shifts, and whether the display remains readable from the learner’s position. These details can be missed in a catalogue photo.

Test with different learners and hand positions before ordering in volume. A mannequin that gives consistent feedback on a quiet showroom floor may feel less clear during a crowded training session. That difference is worth noticing. Confirm that instructors can distinguish shallow compressions from those exceeding 6 cm, and request written calibration and maintenance instructions. The guideline gives a target; the device should help learners practise toward it without implying that depth alone guarantees effective CPR.

Compare Hygiene, Durability, and Replaceable Parts for Repeated Training

A CPR mannequin may look durable on a showroom floor, but repeated training exposes weak points. Check whether the face skin, airway parts, and lung bags can be removed and replaced without special tools. Smooth surfaces are easier to wipe between learners, while deep seams can trap moisture. Follow the maker’s cleaning instructions; harsh cleaners may damage materials. Hygiene is a practical feature, not just a checklist item.

Tips: Ask how many practice cycles key parts are designed to withstand, and whether replacements are sold individually. Inspect the jaw hinge, chest spring, and connector fittings. Can an instructor change a lung bag quickly between sessions? Small details matter. A low purchase price may not reflect the cost of frequent replacement parts.

Compare mannequins using the same training routine. Check chest rise, compression feedback, and how stable the unit feels on a hard floor. Ask for clear maintenance guidance and a parts list before ordering. Wear varies with use, storage, and cleaning, so no single lifespan estimate fits every classroom. I would also leave room for doubt: a neat sample unit cannot show how well a model holds up after months of busy practice.

7 CPR Mannequin Buying Tips for Global Buyers - Compare Hygiene, Durability, and Replaceable Parts for Repeated Training

Buying Tip What to Compare Useful Buying Signal Why It Matters for Repeated Training Question to Ask the Supplier
1. Check hygiene between learners Single-use face shields or lung bags, removable airways, and surfaces that can be cleaned according to the care instructions. Consumables are easy to replace, and cleaning guidance identifies compatible products and procedures. Clear routines help instructors manage hygiene when many learners share a training manikin. Which parts are single-use, and what cleaning products are approved for the reusable surfaces?
2. Inspect high-wear components Chest skin, airway parts, face pieces, connectors, and other components exposed to frequent handling or compression. Wear-prone parts can be inspected and replaced without discarding the complete manikin. Repeated sessions can wear components at different rates; targeted replacement can reduce downtime and waste. Which components are considered wear parts, and are replacements available individually?
3. Compare compression feedback How the manikin indicates compression depth and, where provided, rate or recoil. Feedback is easy for learners and instructors to see or hear, and the instructions explain how it works. Consistent feedback supports practice and helps instructors identify when a component or sensor needs attention. Does feedback require batteries, calibration, or replaceable electronic components?
4. Evaluate construction for regular use Frame stability, skin attachment, seams, handles, and the stated care and storage requirements. The supplier provides clear maintenance guidance and information about repair or replacement of damaged parts. A stable, serviceable design is easier to maintain through frequent classes and routine transport. What parts are covered by the warranty, and how are repairs handled in our destination country?
5. Confirm the right learner size Adult, child, or infant configuration; body positioning; and whether the model supports the scenarios in the course. The product documentation clearly describes the intended learner level and training uses. Choosing the appropriate size helps match practice activities to the course rather than relying on one model for every scenario. Which training scenarios can this model support, and what accessories are needed?
6. Check availability of consumables and spares Face shields, lung bags or airways, chest skins, fasteners, and any model-specific parts. Part numbers, ordering details, and storage or compatibility information are supplied before purchase. Access to compatible spares helps keep a training set usable without replacing the whole unit. Can you provide a parts list and confirm which spares fit the exact model and production version?
7. Plan for international delivery and support Packaged dimensions and weight, replacement-part shipping, documentation, and local service options. Specifications and support terms are available in writing, with clear guidance on ordering parts across borders. Transport costs, import requirements, and repair lead times can affect the total cost of ownership. What are the packed dimensions, shipping options, and expected process for obtaining replacement parts internationally?

Assess Global Supply: Documentation, Power Compatibility, Spare Parts, and Total Cost

Global buyers should check the documents before approving a CPR mannequin order. Request a user manual, packing list, cleaning guidance, and available conformity documents for the destination market. Confirm what the documents actually cover; a certificate for one component may not describe the complete training system. Check power details too. An adapter marked 100–240 V may still need a different plug, and rechargeable models may require locally available batteries.

Tips: Ask for the voltage range, frequency, plug type, and battery specifications in writing. Keep the reply with the purchase records. Small detail, big delay.

Spare parts can determine whether a mannequin stays useful after frequent classes. Ask about replacement faces, airways, lungs, skins, and feedback sensors, including prices and typical dispatch times. Then compare the total cost: unit price, freight, import charges, accessories, maintenance, and likely replacement parts. A low quote can look attractive until shipping a small component takes weeks. Build a simple cost sheet, but leave room for uncertainty; freight estimates and service timelines can change. I would also request a sample parts list before placing a large order, even if it makes the process slower.