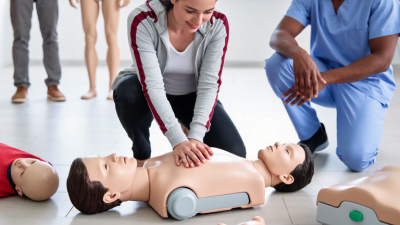
Choosing Cpr Training Manikins is a practical decision about what learners can feel, see, and repeat. The American Heart Association’s 2024 Heart Disease and Stroke Statistics report estimates approximately 356,000 out-of-hospital cardiac arrests occur annually in the United States. That scale makes accessible, realistic CPR practice important. A manikin should help learners recognize effective technique, not just look convincing on a training-room table.
The AHA’s 2020 Guidelines for CPR and Emergency Cardiovascular Care recommend adult chest compressions at 100 to 120 per minute, with a depth of at least two inches. A suitable training manikin can provide feedback on rate, depth, and recoil, helping instructors identify errors during practice. Small details matter. Consider whether the model supports adult, child, or infant scenarios; whether its airway components are easy to replace; and whether its skin can withstand repeated cleaning. Check feedback compatibility, replacement-part availability, storage needs, and the full cost of ownership—not only the purchase price. A low-cost model may be a poor value if essential parts are difficult to source. Yet no manikin makes a learner calm by itself. That gap deserves thought. These ten tips will help buyers compare realism, durability, instructional features, and maintenance requirements, while keeping the training setting and learners’ needs in view.
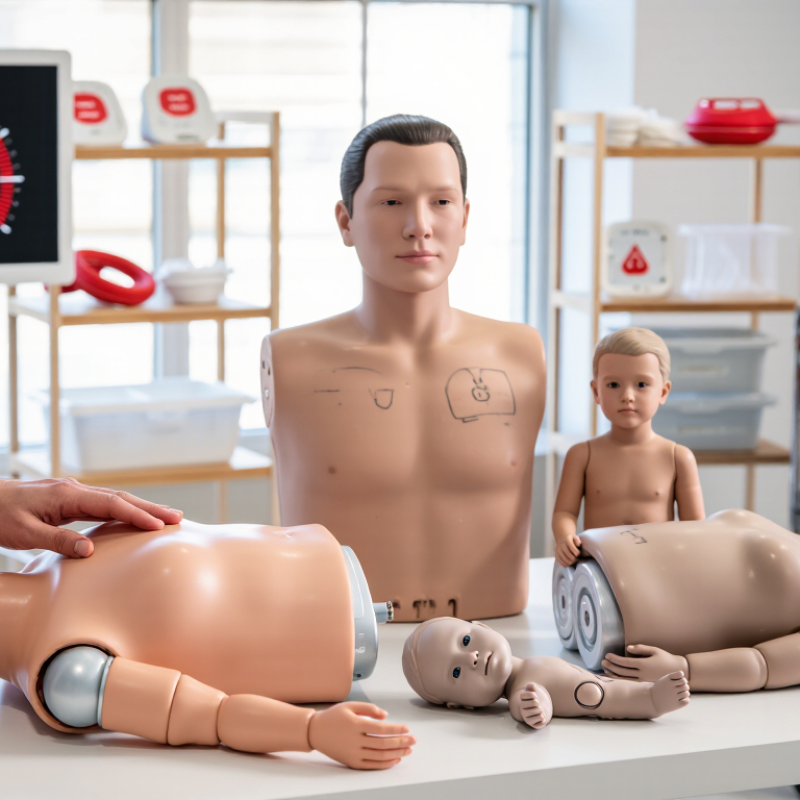
When comparing CPR training manikins, make the practice goal measurable. AHA guidance recommends an adult compression rate of 100–120 per minute. That is about two compressions each second. A metronome or feedback display can help learners maintain pace, but it cannot replace an instructor’s observation. Check hand placement and visible chest movement, too. A steady beat helps.
Tip: Test the manikin before buying. Confirm its feedback clearly shows whether compressions are too fast or too slow. If possible, let learners practise for a minute and review the rate display together. Look for simple, readable signals that remain clear in a busy classroom.
Rate is only one part of effective practice. Adult compressions should reach at least 2 inches, or 5 centimetres, while avoiding depths over 2.4 inches, or 6 centimetres. Learners should also allow the chest to recoil fully after each push. Choose a model that provides useful feedback on these actions, not just speed. Small errors matter. Even experienced instructors may find that learners focus on the numbers and forget recoil, so build brief pauses for coaching into practice.
For adult CPR, aim for a compression rate of 100–120 compressions per minute. The bar shows the recommended target range, not measured performance.
For individual practice, choose a compact adult manikin with realistic chest resistance and clear compression feedback. A simple screen or indicator can help learners check rate, depth, and recoil without an instructor beside them. The American Heart Association’s 2020 CPR and ECC guidelines identify feedback devices as useful for CPR training. Still, feedback cannot replace coaching. A learner may chase a green light and miss poor hand placement.
Group classes need durable manikins that are quick to clean and reset. Multiple units reduce waiting, so each person gets more hands-on practice. The AHA’s 2024 Heart Disease and Stroke Statistics Update estimated 356,000 out-of-hospital cardiac arrests among U.S. adults annually. That scale makes practical training capacity important, though the figure does not measure manikin effectiveness. Check whether face shields, lungs, and replacement parts are readily available. Small details matter.
Simulation manikins suit teams practicing coordinated care, changing scenarios, and communication under pressure. Some models support airway procedures and instructor-controlled responses, but added features bring setup time and cost. Match features to learning goals, not showroom appeal. Test the controls. If learners spend more time troubleshooting than compressing, the setup needs rethinking. A basic model may serve a small class better; a high-fidelity unit can still be the wrong fit.
When comparing CPR training manikins, check how clearly they show compression depth. For adult practice, learners should aim for 5–6 cm, not shallow presses or forceful over-compression. A display, light, or audible cue can make each attempt easier to assess. Make sure feedback responds to the learner’s actual hand pressure, rather than giving a vague signal after every push.
Full recoil matters just as much. The chest should rise completely between compressions, allowing it to return to its starting position. Look for feedback that detects leaning, since even slight, continuous pressure can prevent full release. Small details matter. A manikin that tracks both depth and recoil helps instructors correct technique while the drill is underway, not only afterward.
Check that the training setup supports a clear 30:2 rhythm: 30 compressions followed by two rescue breaths. Some models provide pacing cues, but these should not replace instructor observation or current training guidance. Try a short practice cycle before choosing. Do learners see and understand the feedback? Does it interrupt their rhythm? Feedback can be useful without being perfect; confusing signals may distract beginners, so consider how the manikin performs with different learners and room conditions.
Durability is more than a thick plastic shell. Repeated kneeling, compressions, and transport strain hinges, skin seams, and springs. The American Heart Association’s 2020 CPR and ECC Guidelines recommend adult compressions at 100–120 per minute. They specify at least 5 cm depth, while advising rescuers to avoid depths above 6 cm. Worn mechanisms may give inconsistent feedback. Test rebound after several firm compressions. Small parts matter.
Cleaning affects class turnover. The CDC’s 2008 Guideline for Disinfection and Sterilization emphasizes cleaning before disinfection, since soil can interfere with the process. Follow the manikin’s specific care instructions; avoid soaking electronic components or using unapproved chemicals. Smooth surfaces and removable face pieces make routine cleaning easier. Ask how long cleaning takes between students. A few extra minutes can add up across a busy training day.
Check whether lungs, airway tubes, and face pieces are replaceable, and whether staff can change them without special tools. Ask for written guidance on replacement intervals and part availability. The AHA targets make consistent chest movement important, but a working feedback display alone cannot prove the mechanism is sound. I would not assume a low purchase price means lower long-term cost. Still, spare parts need storage, tracking, and staff who know how to fit them correctly.
A low purchase price can hide a high cost per learner. Estimate how many learner-sessions each manikin will support, then divide its expected lifetime cost by that number. Include the purchase price, replacement parts, shipping, and routine upkeep. For example, a unit used by 240 learners over three years costs less per learner than one used by 60, even if it costs more upfront. Keep the class-size estimate realistic. A full schedule looks good on paper.
Compare warranty terms beside that calculation. Check how long coverage lasts, which components it includes, and whether normal wear or frequent cleaning is excluded. Ask who pays for return shipping and how repairs affect scheduled classes. A loaner unit can matter. So can response time. A warranty is only useful if the support process works when a valve or chest component fails. I still find one estimate slippery: usage varies from season to season. Build a low-use and high-use scenario in a simple spreadsheet. Then compare cost per learner under both, rather than relying on the most optimistic enrollment forecast.
| Tip | Manikin type or feature | Estimated unit price (USD) | Warranty benchmark to verify | 8 learners Units; total cost; cost per learner |
16 learners Units; total cost; cost per learner |
24 learners Units; total cost; cost per learner |
|---|---|---|---|---|---|---|
| 1. Set a practice ratio | Basic adult CPR torso manikin | $100–$250 Planning midpoint: $175 |
Check whether a one-year limited warranty covers defects in materials and workmanship. | 4 units; $700 total; $87.50 per learner | 8 units; $1,400 total; $87.50 per learner | 12 units; $2,100 total; $87.50 per learner |
| 2. Compare feedback features | Adult manikin with compression feedback | $350–$700 Planning midpoint: $525 |
Confirm the term for the manikin and separately for any sensor or feedback module; coverage may differ. | 4 units; $2,100 total; $262.50 per learner | 8 units; $4,200 total; $262.50 per learner | 12 units; $6,300 total; $262.50 per learner |
| 3. Include infant practice | Basic infant CPR manikin | $100–$250 Planning midpoint: $175 |
Ask whether skin, airway parts, and other wear components are included in the warranty or excluded as consumables. | 4 units; $700 total; $87.50 per learner | 8 units; $1,400 total; $87.50 per learner | 12 units; $2,100 total; $87.50 per learner |
| 4. Check feedback compatibility | Infant manikin with compression feedback | $250–$500 Planning midpoint: $375 |
Confirm warranty coverage for sensors, cables, and software-related components, where supplied. | 4 units; $1,500 total; $187.50 per learner | 8 units; $3,000 total; $187.50 per learner | 12 units; $4,500 total; $187.50 per learner |
| 5. Compare bundles carefully | Adult-and-infant training bundle (one of each) | $300–$650 Planning midpoint: $475 |
Check whether both manikins have the same warranty term and whether the bundle has one or separate service processes. | 4 bundles; $1,900 total; $237.50 per learner | 8 bundles; $3,800 total; $237.50 per learner | 12 bundles; $5,700 total; $237.50 per learner |
| 6. Match realism to the course | Full-body adult CPR manikin | $250–$600 Planning midpoint: $425 |
Ask about warranty coverage for joints, moving parts, and replaceable airway components. | 4 units; $1,700 total; $212.50 per learner | 8 units; $3,400 total; $212.50 per learner | 12 units; $5,100 total; $212.50 per learner |
| 7. Buy only needed scenarios | Adult CPR manikin with foreign-body airway obstruction practice feature | $200–$450 Planning midpoint: $325 |
Verify whether the added feature has separate parts, replacement costs, or a different warranty from the base unit. | 4 units; $1,300 total; $162.50 per learner | 8 units; $2,600 total; $162.50 per learner | 12 units; $3,900 total; $162.50 per learner |
| 8. Price recurring supplies | Manikin designed for replaceable lungs or face pieces | $120–$300 Planning midpoint: $210 |
Confirm which reusable parts are covered and budget separately for single-use or routine-replacement supplies. | 4 units; $840 total; $105.00 per learner | 8 units; $1,680 total; $105.00 per learner | 12 units; $2,520 total; $105.00 per learner |
| 9. Consider transport and storage | Lightweight, portable adult CPR torso manikin | $150–$350 Planning midpoint: $250 |
Check whether the case or carrying bag is included and whether it has separate coverage. | 4 units; $1,000 total; $125.00 per learner | 8 units; $2,000 total; $125.00 per learner | 12 units; $3,000 total; $125.00 per learner |
| 10. Review the full feedback system | Adult manikin with electronic or app-connected CPR feedback | $500–$900 Planning midpoint: $700 |
Ask about battery, sensor, app, and software support terms; confirm compatibility with your devices before purchase. | 4 units; $2,800 total; $350.00 per learner | 8 units; $5,600 total; $350.00 per learner | 12 units; $8,400 total; $350.00 per learner |
Planning estimates only, not vendor quotations. Prices and warranty terms vary by product, seller, region, and included accessories; verify the written warranty and current price before purchasing. Cost per learner here is the estimated initial equipment purchase cost divided by the learners in one class, using one manikin or bundle per two learners. It does not include shipping, taxes, consumables, maintenance, or later classes.