How to Use a Dummy for CPR Training Effectively?
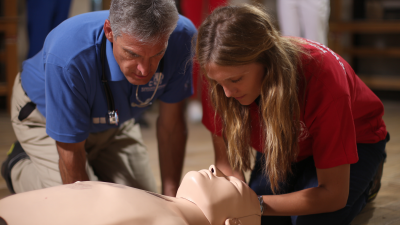
In emergency situations, knowing CPR can save lives. A Dummy for CPR is an essential tool for effective training. It allows participants to practice techniques in a safe environment. This hands-on experience builds confidence and skill.
Using a Dummy for CPR can be simple. Trainees can learn proper hand placements and compression rates. However, some may struggle with timing or pressure. Mistakes during practice are common. Each error provides a chance for reflection and improvement.
Effective training requires more than just repetition. Instructors should encourage feedback and discussion. This interaction can deepen understanding. Remember that every session with a Dummy for CPR enhances preparedness. Lifesaving skills are vital in real-life scenarios, and practice makes a difference.
Importance of Using Dummies in CPR Training
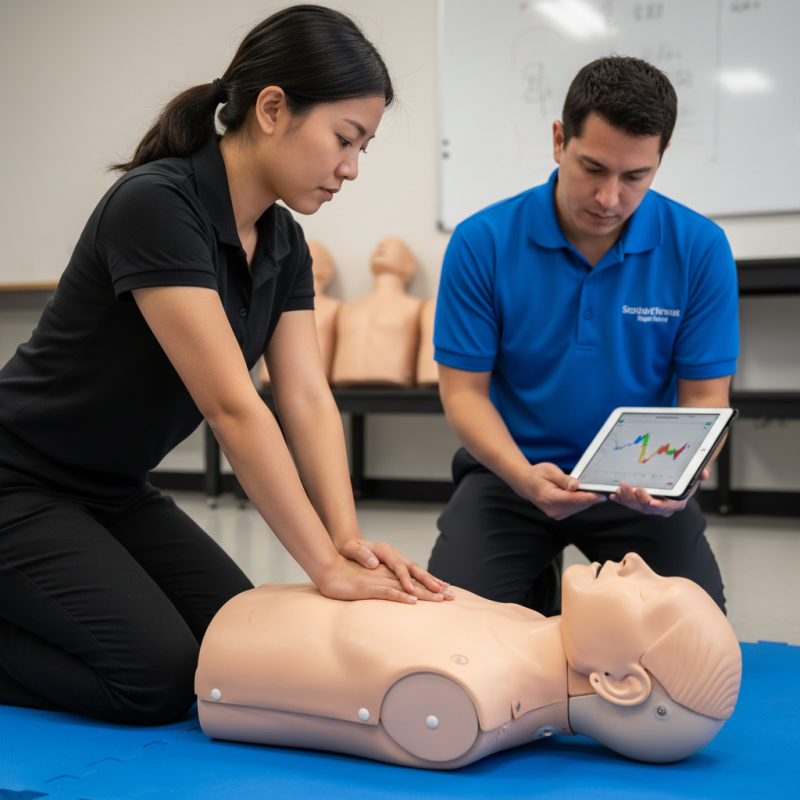
Using dummies in CPR training is essential. They provide a realistic experience for learners. Practicing on a dummy helps understand proper hand placement. It also shows how to deliver effective compressions. Learners can visibly see the results of their actions. This feedback is crucial for developing muscle memory.
However, dummies are not perfect. Some may lack realistic features, leading to misconceptions. Participants might not realize how soft or hard a real chest can feel. It's common for learners to struggle with the correct depth and rate. They may think they're doing well, but a dummy can hide flaws. Regular assessments can highlight areas for improvement.
Real-life scenarios differ from practice. It's easy to feel confident in a training setting. Yet, in emergencies, stress can impact performance. Dummies are great tools, but they cannot replicate real situations. Practitioners must reflect on their performance. Continued practice and feedback are vital for readiness.
Selecting the Right Dummy for Effective Training
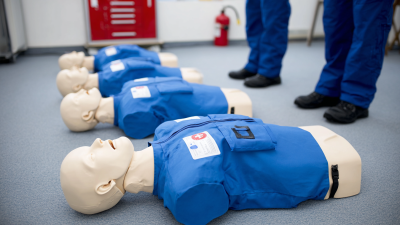
When selecting a dummy for CPR training, consider its realism and functionality. The best dummies replicate human features such as size, weight, and anatomical landmarks. Look for features like an adjustable airway, which allows trainees to practice proper head-tilt and chin-lift techniques. A good training dummy should also be easy to clean and maintain, as hygiene is essential.
Don’t forget about the cost and availability of replacement parts. Some dummies may require specific accessories or consumables, which can add to overall training expenses. Additionally, consider the target audience. A dummy for healthcare students may differ from one for community training. Assess the training environment as well. In some cases, using a lighter dummy can facilitate more mobile training sessions, but it might lack some realism.
Reflect on your training goals. If participants struggle with the techniques, a dummy that does not provide adequate feedback could hinder skill acquisition. Ensure the selected dummy can offer different levels of feedback based on the training scenario. This will guide learners through discovering their strengths and areas for improvement in CPR techniques.
Step-by-Step CPR Techniques Using a Training Dummy
Practicing CPR using a training dummy is essential for effective response in emergencies. The American Heart Association reports that timely CPR can double or triple survival rates from cardiac arrest. Engaging with a dummy allows learners to gain hands-on experience. This can enhance memory retention and skill application during actual emergencies.
When practicing, ensure proper positioning. Align the dummy’s head and chest correctly. Be firm yet gentle when performing chest compressions. Aim for a depth of about 2 inches at a rate of 100 to 120 compressions per minute. Practice open-air breaths actively. Lean forward, sealing your lips around the dummy’s mouth, delivering two effective breaths after every 30 compressions.
Tip: Regular repetition helps reinforce these skills. Try to engage in training sessions at least once every three months. Incorporate scenarios where the dummy is in different positions. This builds adaptability and makes practice feel more real.
Reflect on your technique as you train. Are your compressions consistent in depth? Are your breaths effective? These details matter. Noticing small mistakes can lead to significant improvements. Training dummies provide a safe environment to grow and refine these skills.
How to Use a Dummy for CPR Training Effectively? - Step-by-Step CPR Techniques Using a Training Dummy
| Step |
Technique |
Description |
Duration (mins) |
| 1 |
Preparation |
Ensure the training dummy is in a safe and accessible location, and that all participants understand the purpose of the training. |
5 |
| 2 |
Check Responsiveness |
Demonstrate how to check for responsiveness by gently shaking the dummy and shouting. |
3 |
| 3 |
Call for Help |
Instruct participants on how to call emergency services if the dummy is unresponsive. |
2 |
| 4 |
Chest Compressions |
Show the correct hand placement and technique for performing chest compressions. |
10 |
| 5 |
Rescue Breaths |
Demonstrate how to properly give rescue breaths and ensure a good seal. |
8 |
| 6 |
Continue the Cycle |
Explain the importance of continuing cycles of 30 compressions and 2 breaths until help arrives. |
5 |
| 7 |
Practice Sessions |
Encourage participants to practice the techniques multiple times to build confidence. |
15 |
Common Mistakes to Avoid During CPR Training
When training for CPR, many learners make common mistakes that could hinder their effectiveness. One frequent error is neglecting the right depth and pace of chest compressions. Research indicates that compressions should be at least two inches deep and between 100 to 120 compressions per minute. Not maintaining this range can lead to insufficient blood circulation.
Another mistake is failing to practice proper hand placement. If learners place their hands incorrectly, it may not provide the necessary force. In a study published in the Journal of the American Heart Association, incorrect hand positioning was found in 40% of practice sessions. This oversight can seriously impact the quality of chest compressions.
Some trainees also skip the importance of rescue breaths. Many assume that compression-only CPR is enough, which studies show can lead to higher mortality rates. For adult patients, the recommendation is a 30:2 ratio of compressions to breaths. Practicing this ratio can greatly improve outcomes during emergencies. Mistakes are learning opportunities; recognizing and correcting these errors is vital for successful CPR training.
CPR Training Common Mistakes
Assessing and Providing Feedback on Training Performance
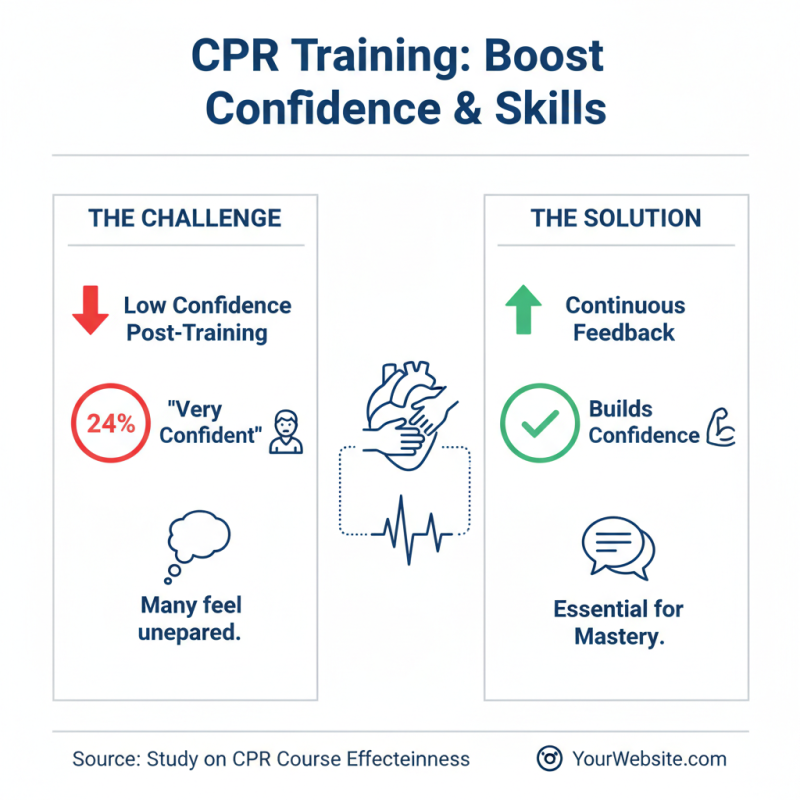
In CPR training, effectively assessing performance is crucial. A study found that many trainees feel unprepared after basic instruction alone. Just 24% of participants in various CPR courses rated their skills as "very confident." Continuous feedback is essential to build this confidence.
When using a dummy for CPR training, trainers should observe participants closely. Note their hand placement, compression depth, and timing. It’s common for beginners to neglect the rhythm. The American Heart Association suggests a rate of 100 to 120 compressions per minute. Encourage trainees to practice at this pace.
Tips:
- Use video recordings. Playback can reveal mistakes and highlight areas for improvement.
- Create a supportive environment. Trainees may hesitate to ask questions, yet clarity boosts their learning.
- Conduct regular assessments. Frequent evaluations keep skills fresh and identify weaknesses early.
Feedback shouldn't be solely critical. Positive reinforcement can enhance motivation. Many trainees fear failure, which can hinder growth. So, while correction is necessary, celebrate small achievements too.